Show gratitude while creating a beautiful piece of artwork.
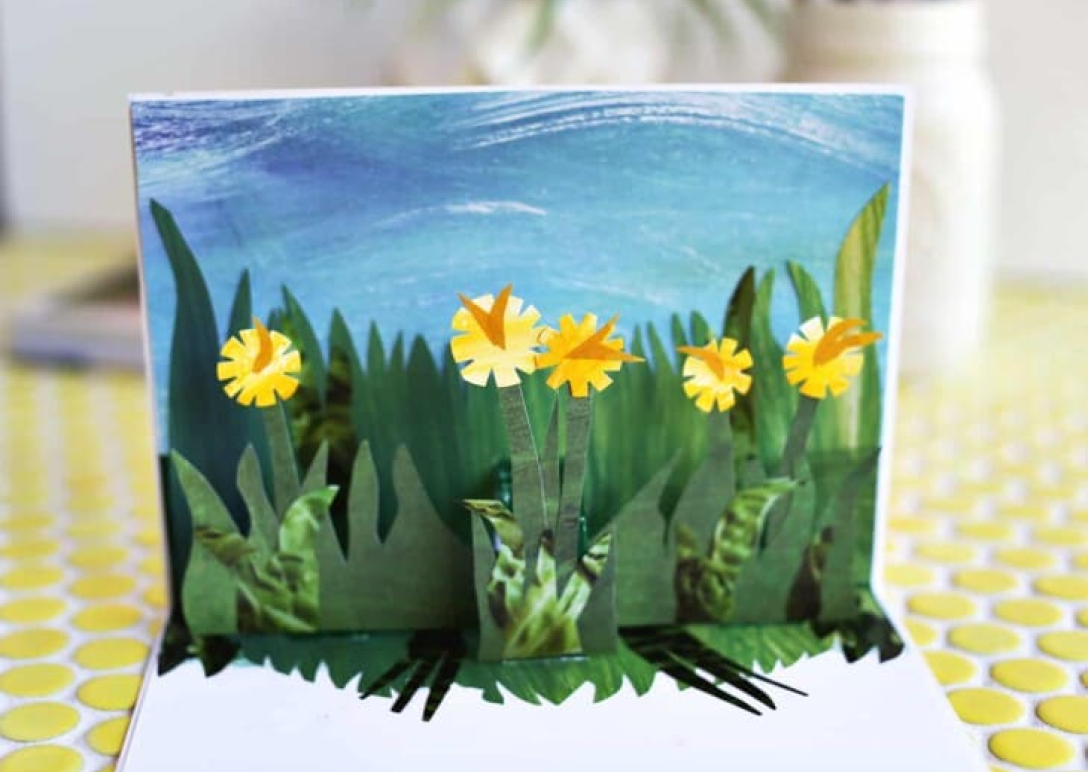
In this creative crafting activity, learn how to make a unique and memorable pop-up thank you card!
How to Prepare:
Collect the following items before you begin:
- Blank card
- Paper cut to the same size as your card (any type or colour)
- Art supplies (markers, crayons, coloured pencils, paints)
- Collage papers or magazine photos
- Glue Stick
- Scissors
Create Your Thank You Card!
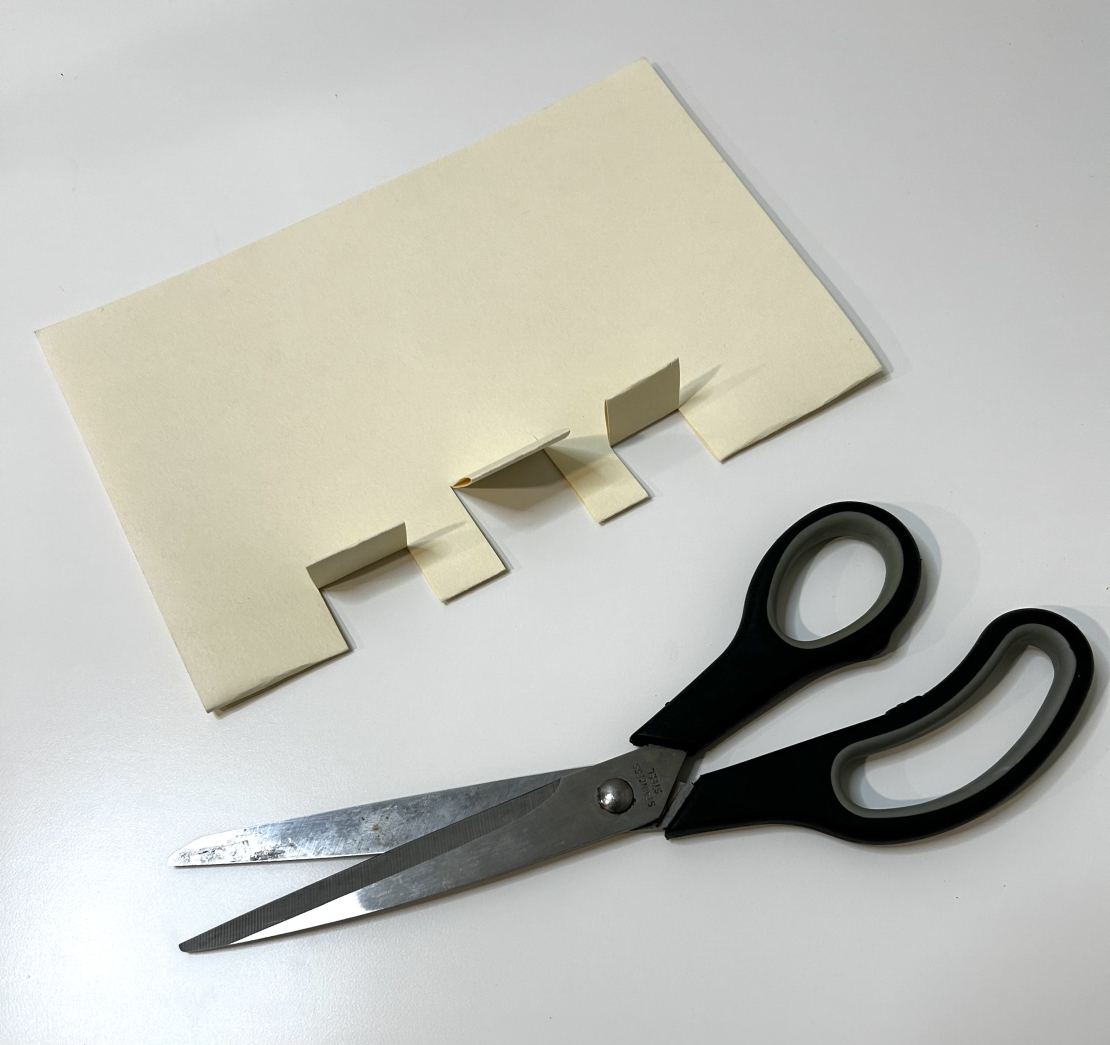
Step 1: Fold your piece of paper in half.
Step 2: Cut small tabs along the folded edge of your paper. You can make the tabs various depths, but try about 1” tabs to begin with, spread out along the fold. These tabs will be used to hold up your pop-up elements. You can have one main tab or multiples. This is where you will eventually add your collage or photo pieces.

Step 3: Time to create the inside elements for your card—the pieces that will pop up! Look through different collages and magazines and cut out any photos/elements that you want to include as a pop-up in your card.
💡Activity Hack! Make sure the inside elements you create won’t hang off the edge of your card once it’s closed. Just place them on the tabs, without glueing,before the next step!
Step 4: Once you have your inside elements in place, glue them to your piece of paper.
Step 5: Now that all the pieces are in place, glue your piece of paper to the outer card, but be careful not to glue down the tabs!
Step 6: Once the card is dry, you’re ready to add a message. You can personalise it any way you want!
Make a thank you card to show your gratitude (and creativity!) to your Club Leaders and friends, or for your caregivers!
Thank You Card Complete! Congratulations!
This activity is inspired by:
https://abeautifulmess.com/how-to-make-a-simple-pop-up-card/