A quick way to customize clothes with color!
Follow these step-by-step instructions to craft your own tie-dye T-shirt using Sharpie markers, rubbing alcohol, and a sprinkle of artistic flair.
CAUTION: Be sure to wear eye protection and gloves while handling isopropyl rubbing alcohol. Be sure to ask an adult for help using the clothing iron.
Overview
Discover an easy and imaginative way to add a burst of color and unique designs to your clothing. This creative project is perfect for both youth and adults, and it involves using Sharpie permanent markers to create eye-catching patterns on plain white T-shirts. Dive into the world of DIY tie-dye with just a touch of creativity and a handful of supplies!
MATERIALS
- White 100% cotton t-shirt
- Cardboard
- Baking pan (or glass or plastic tray)
- Binder clips or rubber bands
- Sharpie permanent markers (assorted colors)
- Isopropyl rubbing alcohol (91%)
- Eye dropper
- Clothing iron or clothes dryer
Instructions
- Start by washing and drying the T-shirt. This step ensures that the fabric is clean and ready for your creative touch. Insert a piece of cardboard inside the T-shirt to prevent the ink from seeping through to the other side.
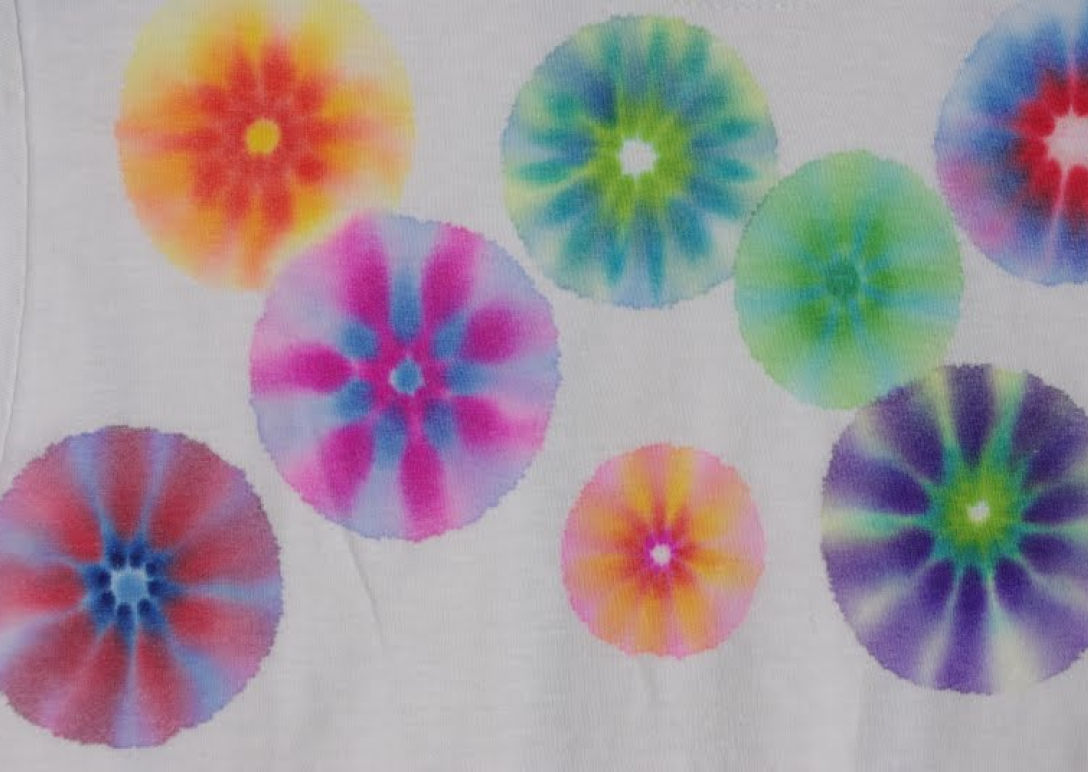
- Let your imagination run wild as you use your chosen Sharpie marker colors to craft your design on the T-shirt. For instance, if you're aiming for a flower pattern, begin with a large dot of ink in one color and then encircle it with smaller dots in a complementary color.
- Repeat step 2 until you are satisfied, trying different color combinations and shapes. Be sure to space out your markings so they don't bleed into each other.
- Remove the cardboard and carefully stretch the T-shirt over a baking pan, ensuring it's taut and not touching the bottom interior of the pan. You can also secure individual sections of the shirt over the mouth of a glass or plastic container, holding them in place with rubber bands.
- With an eye dropper, slowly drip the desired number of drops of rubbing alcohol into the center of your ink design. The more drops of alcohol you use, the further the ink will spread, creating a larger design. Avoid saturating the design with alcohol all at once for more control.
- Allow the T-shirt to dry completely. This step is crucial to set the colors in place and achieve the desired tie-dye effect.
- To lock in the vibrant colors, you can either:
- Apply a hot iron to the design for five minutes. Ensure the iron is set to the highest heat possible for setting the ink.
- Place the shirt in a clothing dryer on a high setting for 15 minutes. Wash the shirt on its own so you don't stain your other clothes!
- Finally, wash your tie-dyed T-shirt separately on the delicate cycle and in cold water to preserve the colors and prevent bleeding.
HOW IT WORKS
Sharpie markers contain pigments and solvents. When you draw on a T-shirt with Sharpie markers, you deposit pigments onto the fabric. Your design is created using these pigments. The alcohol acts as a solvent, dissolving the pigments in the ink. It also spreads the pigments outward from the center of the ink dots due to a process called chromatography.
Chromatography is the separation of pigments based on their chemical properties. Different pigments in the Sharpie ink move at different rates, creating a gradient of colors from the center of the ink dots. This spreading effect creates the tie-dye appearance. Allowing the T-shirt to dry is essential because it enables the alcohol to evaporate. As the alcohol evaporates, it leaves behind the dispersed pigments on the fabric, setting the colors in place.
To further bond the pigments to the fabric and prevent fading, heat is applied. This can be done by using a hot iron or placing the shirt in a clothes dryer on a high setting. Heat helps the pigments penetrate deeper into the fabric fibers. To preserve the tie-dye design, the T-shirt should be washed separately on the delicate cycle and in cold water. This minimizes the risk of color bleeding and helps maintain the integrity of the design.